Sunday, March 31, 2019

Vintage Glimmer border from Becca Feeken


What a glorious Sunday it is and what better way to show it then to share something filled with lots of Glimmer.  Today i am sharing a new card that i made using the new Gilded Age glimmer plates from Spellbinders and Becca Feeken.  I used 2 plates to create the layers on my card and i hope that you love the way it came out as much as i do.  

It's super easy to make this card with the beautiful foils available on the website and all the new dies in the collection speak for themselves i think.   They have gorgeous, gorgeous details in each of them and that just make the foils glow in the sunlight like jewels ..... the gold on ivory is so heavenly.

Here is a view of the plate that i used today.  I love that its an extension type of design that you can continue on to make a longer piece.  This would be gorgeous for a candle wrap too.


And i tried to catch the sun with this picture so that you can see how the foils look.  I accented my card with a shiny gold metallic paper between the layers and added tiny pearls and ribbon to match.  The inside is perfect to add my sentiment and not take anything away from this beautiful card front.  

I listed all the supplies you need and if you ever have a question please feel free to let me know so that i can maybe help you with anything.  

Enjoy your weekend and have fun crafting.

Spellbinders Products:


Papers: Ivory cardstock ( Joann's Craft Store)
Gold Foil Paper: Hobby Lobby

Adhesives: Scrapbook Adhesives by 3L 3D Foam dots and tape runner


Friday, March 29, 2019

Perfect card for a perfect friend


Hi friends and thank you for stopping by today.  I have another card idea to share with the newest release of Shadowbox dies from Becca Feeken and Spellbinders.  This too would make a wonderful box front with a small gift inside but for today i just created a pretty card to send to a friend. 

You could also make this style card up in different colors and stamp different sentiments on them to give as a gift pack for someone to send out.  Mother's day is coming up so it's a good time to start some new projects with all this good weather.


My main die for the front of the card you can see below.  It is called the "Lisette Oval Shadowbox frame".   It has lots of gorgeous pieces that you can use to mix in with other dies that you have in your stash too.  I used the biggest outer die in the set and then mixed it with Hemstitch ovals to add my sentiment in the center.  The blue vintage papers give it a really subtle look and the crisp blue and white really make the dies stand out.  That cute bit of white peeking out of the bow is an old favorite of mine called Stack and Fold Flowers.  I just used one of the petals for the leaves and it looks so pretty with the added details there.  

Here is a peek of the die set you can get online...


And lastly for the base of my card i added another favorite Hemstitch Rectangles to frame it.  You can probably tell this is one of my all time favorite go to dies to use.  It really adds that extra bit of detail i am always looking for to compliment the dies i am using.  So much fun and so little time !!

Thanks so much for stopping by today for more inspiration with our new dies!!  

Teresa

Spellbinders dies used:

Shapeabilities Lisette Oval Shadowbox Frame Etched Dies Shadowbox by Beeca Feeken

Nestabilities Hemstitch Ovals Etched Dies Chantilly Paper Lace Collection by Becca Feeken

Nestabilities Hemstitch Rectangles Etched Dies Venise Lace by Becca Feeken

Shapeabilities Amazing Paper Grace Stack and Fan Flowers Etched Dies

Other: Papers, Adhesive by Scrapbook Adhesives by 3L, stamp by Penny Black, Versafine ink

Sunday, March 24, 2019

She will move mountains


Happy Sunday to all of you that stopped over today.  I have a new project to share that i made using Becca Feeken's new Shadowbox dies.  As you can see the dies can be used seperate and on their own and can also be used to make lots of other fun framed projects too.  You can even get out some favorites and mix them with your other Spellbinders dies.  Its just fun to make pretty things i think.

I went in my stash this week and found some adorable baby papers from Echo park that i had and when i saw this sentiment I got this idea to make a baby door hanger using the 

Shapeabilities Callista Rectangle Shadowbox Frame Etched Dies Shadowbox by Becca Feeken


The largest die in the set fit perfectly under the sentiment card and made it that much cuter and more feminine.  I cut it out of a 110 lb paper to make it thick so that it would stand out as a nicer frame and then added layers of matching paper under it.  


With all that gorgeous detail in the frame i didn't need to add much more but a pretty flower and a piece of ribbon that i had to go with all those pretty papers. 


And how cute is this to hang on the door of a precious baby girls room? 
Simple, cute and so easy to make.  And i know the perfect mom to give this too.....

I hope that you liked my inspiration for today and be sure and check back for lots of other ideas this month.  I have lots more to share.

Teresa

Spellbinders:

Platinum Die Cutting and Embossing Machine - 8.5" Platform


Paper: Echo Park
Adhesives: Scrapbook Adhesives by 3L


Friday, March 22, 2019

Just a Note with Gilded Age Plates by Becca Feeken


Happy Friday everyone and thank you so much for stopping back by my blog today.  I have another card to share using the new Gilded Age Glimmer Plates this week and as you can see i was really inspired by St. Patricks day with all the green and gold.  There are so many colors of foil that you can get sometimes it's really hard to chose.  

For my card i chose the new 

Gilded Vines Glimmer Hot Foil Plate The Gilded Age by Becca Feeken

This is such a beautiful plate and if you had the chance to hop with us last Sunday you saw what beautiful cards that my team mate Melissa did with it.  And i was lucky enough to have the perfect ribbon and rhinestone to embellish mine with too.  And being the Irish lass that i am i have the perfect family member to send this one off to.  


The card itself is just an easy layered card with green metallic paper and gold glitter paper under the foiled top.  For my sentiment i stamped it with gold ink and embossed with gold powder to get that effect.  And i added tiny green rhinestones on the vines to add a bit more sparkle.  It was really fun to try the foil colors this time and i have a few more ideas so be sure to check back again soon.

Have a wonderful weekend
Teresa

Spellbinders Products:

Gilded Vines Glimmer Hot Foil Plate The Gilded Age by Becca Feeken


Other: Green Metallic paper, gold paper, ivory paper, Penny Black stamp, gold embossing powder, green ribbon, gold and green rhinestone and green rhinestones.


Sunday, March 17, 2019

Introducing The Gilded Age Collection Blog Hop


Greetings glimmeristas!    Today, we are launching The Gilded Age - a small glimmer collection with some exquisite plates.  Join us as we introduce five new Glimmer Sets (some with dies) and 1 brand new Die Set that has matching glimmer plates. We've eased into the beautiful habit of building card layers and layering frames with foil and the Spellbinders Glimmer Foil System.   These metal plates are just like stamps and can be used for letterpress and deep embossing as well as transferring gorgeous foils to many items.  Welcome to The Gilded Age Collection - Becca shares her inspiration below:

Inspiration for The Gilded Age

I have a romantic fascination with days gone by and the beautiful, fragile relics that survive to create our memories. The Gilded Age is a look back to a time when beautiful things were all around and each item had a story tied to it.  Fineries were hard earned and treasured, garnered with much pride and bathed with love and sentimental value.  Whether in art or clothes or architecture, the timeless glamour of the era thankfully punctuates our lives today.
It was an age where dreamers knew no bounds in decorating and inventing, paving the way for exquisite art, extravagant embellishment and a level of grandeur that defies simplicity.   We're fortunate that traces of the era live on.  One of our present day methods of gilding comes in the way of foiling. Once only able to be carried out at prints shops, it was an expensive process that signaled exceptional taste; your eyes can't help but be drawn to it.
In the collection, I've curated a couple of looks inspired by a ladies stationary desk.  A desk where she might sit a compose "Thank You" notes with care and attention to detail using her coveted fineries of the day.  Each plate in the collection delivers a mark that can be considered hallmarks of fine penmanship and papers.  I'm convinced that each of us has a mark, an indelible mark - the tools are there, calling out for us to use them.


I'm tickled to get to introduce GLP-121 Gilded Trimmings


Here is what the plates actually look like:


I love these 2 plates and found that there was so much that you could do with them.  For my card i used the thickest plate to create a border in the light blue with the silver foil and then under that i also added another layer that i made with the smaller border plate on both sides.  This was easy to do because the foils can be heated one right after another and it all looks so beautiful when it's done.

I also had a white box that i bought and decorated with the wider border that i heated twice to make a continuous border all the way across the top.  For this one you will need some tape to position your paper as you work but the result is gorgeous so it's worth the time. 

Availability:
These plates are available right now on the Spellbinders website —–> HERE

Prizes:
In the meantime, be sure you leave a comment on this post and every Creative Team Members post for a chance to win an Amazing Paper Grace Die from any previous collection.

There are three dies that are being given away.  One name will be randomly picked from comments left on the combination of our seven blogs on the Introducing The Gilded Age Blog Hop post between March 17 and March 22, 2018, at midnight US Central Time.  We encourage all of our international friends to participate!  The randomly selected names will be announced on the Amazing Paper Grace Blog on March 23rd.  (All giveaways for this hop are managed by and the responsibility of Amazing Paper Grace).


There will be a total of three dies and a winner can win once among all the blogs.  If your name is selected, simply claim it within 2 weeks of the announcement by sending your address through the form under the Contact Tab on the Amazing Paper Grace Blog.  There won’t be a reply back but if you leave your choice, we’ll get it, I promise.  When sent, you will get an email that your die is on the way. The dies will be mailed out from Amazing Paper Grace.

Creative Team:
Visit Joanna   – joannakrog.blogspot.com
Visit Teresa   –  victorianpaperqueen.blogspot.com
Visit Melissa  – keepsakesbymelissa.blogspot.com 
Visit Ewelina -  elinaart.blogspot.com
Visit Judy       – judyhayesdesign.blogspot.com 
Visit Kate       – craft2owls.blogspot.com
Visit Becca     – amazingpapergrace.com/blog

Thanks so much for joining us for the Introducing The Gilded Age Blog Hop.  We hope you'll find a little bit of inspiration along the way!  Don't forget to leave a comment to tell us which plate you like best - do you have a favorite?  Have you tried Glimmer yet?  What's your favorite way to use foils?

If you are new glimmer you can see this post for answers to frequently asked questions ------; HERE.

Sunday, March 10, 2019

Amazing Paper Grace March Die of the Month Blog Hop


Do you ever suffer from blank page syndrome?  Or you clear your schedule and your table and sit down to make a card, and then bam - your mind goes blank.  That's why we're here!  We love bringing you inspiration for the Die of the Month and today is our Die of the Month Blog Hop for March.  

Since we all see things differently, it's our aim to show you how each of us approached designing with this die and the lovely pieces that are a part of it.  Our hope is that you snag a picture or two for your inspiration file and they come in handy next time you sit down to create.  Our list of links at the bottom of the post lead to all the inspiration.

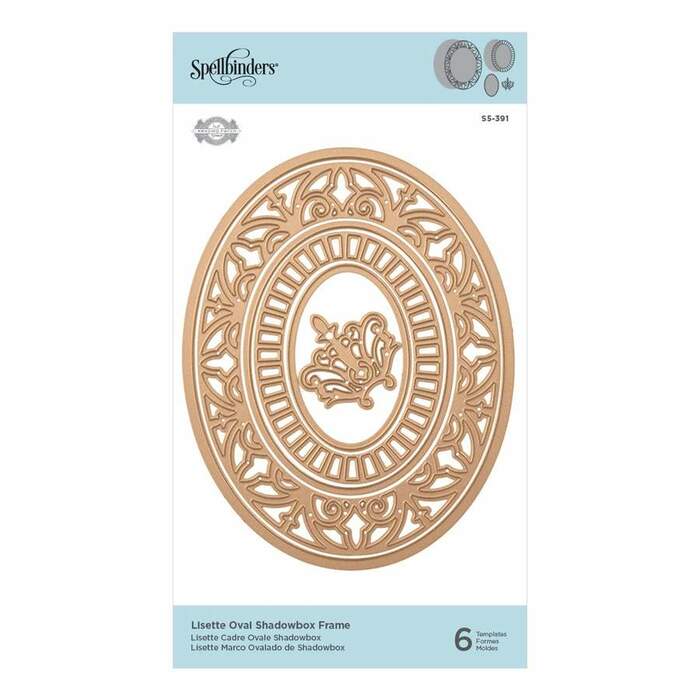
The six pieces that make up Spun Blessings Oval combine to make a card front die, perfect for a background or you can creatively use all of the inlays for either accents or borders.  You may have noticed, it's a big die but the better to make alternative designs like the little baskets that help to create an ensemble.

If you want to find out more about the Club - prices, how you sign up and what's included, please look -------; HERE.
If you missed the introduction and want to know more about what inspired the Die of the Month Club, look -----;HERE.

My first project is a Card and box:


When you get a set of dies there is a set pattern that Becca designs for us to see and of course it is always out of the park Amazing.... but sometimes it is fun to get more milage from a die set and that is when you can use the pieces in the set other ways like i did with my card.  It's really simple and easy to do just by taking the top and bottom pieces and taping them together to cut and emboss a window on a piece of card stock. 

I added clear acetate behind my cutout to give it more support and then i cut the hemstitch rectangle out of a beautiful piece of peach printed paper and matted it with white, grey and more white.  The flowers are also from Spellbinders and the Thank you stamp is from Penny Black.


And for my little box i used the same papers and this time i used the sides to cut our a square for the top and then used the tag to stamp and lay across the center.  This almost looks like an old fashioned church window and since it has so much detail already i only needed to add a few flowers and ribbon.

My second idea for today is: 

This stationery set


One of my favorite gifts ever was a set of stationery and envelopes inside a pretty decorated folder.  This die is the perfect cover idea for that book.  I used gorgeous shades of purple and lavender and grey to create this folder and then cut my dies out of the same and added silver to really set it off.  The flowers I made from our newest Cinch and Go flower set and inked them to give them more depth.  


And of course i added lots of pearls and rhinestones to really jazz it up.  I love this set and as you will see as you hop around to all the other talented ladies on our team, there really is some amazing things that you can do with it.  Below is a peek at the inside of it.  


Supply List:  

Dies:  Spellbinders Amazing Paper Grace March Die of the Month

Stamps: Penny Black
Paper: Bazzill Basics Card stock
Ink:  Tsukineko Archival ink, ink cubes in purples

More inspiration is just a click away.  Stop by with each Creative Team Member to see more!

We can’t wait to see what you make with these exclusive dies – be sure to post your creation on the Amazing Paper Grace Die of the Month page -------> HERE or on Instagram using the hashtag #AmazingPaperGraceClubKit


Saturday, March 2, 2019

Memories of your baby girl


This week we are sharing more ideas with all of you using Becca's new Shadowbox dies and i had a really good idea for all you new moms and grandmothers out there.  Since you can make what ever size frame you want you could create cute frames to put in their little tiny hand and footprints to save.

This is one of my favorite frames so far and would be so special to give as a gift too.


For my frame i wanted to use the "Shadowbox easel die" to make a pocket for the tiny footprints and also for the back to help it stand up on the shelf.  So to make it fit i made the frame  5 1/2 x 5 1/2 inches and i made it in the palest pink and then added those cute corners from the Rectangle shadowbox frame set to each corner of my frame.  They go perfectly with the pocket and add such a feel of femininity to it.


And for the bottom of the pocket i added a small matching butterfly in the center that i cut from Becca's Flutterwing die set and added a beautiful arrangement of flowers and of course pearls.  
It wasn't hard at all and is going to look perfect in a baby nursery somewhere.

Thanks so much for stopping over today.  Here in Cali it's a cold and rainy day so it's
perfect to get all my scrappy projects done :)  Enjoy your weekend.

Supplies:

Spellbinders Dies:

Shapeabilities Filigree Shadowbox Easel and Pocket Etched Dies Shadowbox by Becca Feeken


Paper:  Bazzill Basics in light pink, pale pink and kraft

Adhesive: Scrapbook Adhesives by 3L Tape runner, adhesive tape and 3D foam squares


LinkWithin

Related Posts Plugin for WordPress, Blogger...