Friday, December 27, 2013

Cardabilites sketch #89

Hi Everyone out there in craftyland :)  I hope that you all had
 a wonderful Christmas and are ready to relax and enjoy 
the last days of 2013.  I started to get all my pictures ready 
to be printed today so that I could get caught up with 
some pages and all that and realized I am just a little behind.  
But you have to start somewhere so I am getting it all out
to the printer and then getting busy this month and
next to catch up.  I had a great year and can't wait
to see what 2014 holds for me :)

So today I had a bit of time so I am joining in for the 
Cardabilites sketch for this month although I am a tad late.


   I did my card with a 6x6 paper pad by MME called
"In bloom" with pretty shades of pink, peach, yellow and grey.
I also used a new stamp from Verve stamps.  I have never
used them but boy are they great.  I ordered a whole bunch
with the sale going on now and they have really, really 
cute sentiments and other goodies!!  Can't wait to do more!


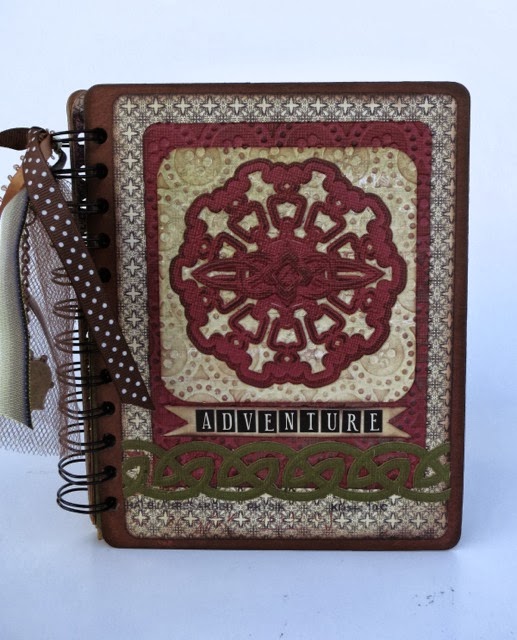
For the doily I made my own using one of the Die-D-lites
called Medallion Four.  I love these little beauties and think
I am going to have to get the whole set of them here....
 They are so cute and have the lots of styles and they
are small and fit cards perfectly....I really love using them!

and of course here is the sketch for this month--


I love the tab at the top and I think it would be super
cute to adapt for Valentines and put a pocket for sweets.

Hope all of you have a great day and thanks for
taking the time to stop and i would love to hear from you
if you would like to leave a comment :)

Saturday, December 21, 2013

Butterbee Scraps Necklace Set


Happy Saturday to all of you... 
 Today I have something really pretty to share that I made
to wear for New Years.  If you haven't gotten anything yet you
can put this together pretty quick and then you have the whole set
 to match and wear out to celebrate the new year!


Many of the things that I do are inspired from something and
I love the knights of the round table and the intricate chainmail 
that they made and wore.  My butterfly necklace is a quick
inspiration from just that.  I started it with a simple chain,
some 6mm jump rings, tiny bronze metal flowers and this beautiful
metal butterfly to match.  Below is a few of the things
that I used to make it.  The Large Butterfly is # 042-B and the little
bronze flowers are 103-B.  The Antique Bronze toggle clasp is CL071-B.
 And you can also get the jump rings and rhinestones in the store too.


Here is a photo of the finished necklace as it would look on.

To attach each of the flowers on the necklace I used 2 jump rings 
so that they would lay flat when i wore it. I attached the large 
Butterfly in the center and then counted over to attach each of
the flowers with the jump rings.  To finish my necklace I attached
the same clasp that you see on the bracelet below with jump rings
on the ends of my chain.  It's unbelievably lightweight and takes
some time but I think that it is worth it.


To make the bracelet, first measure your wrist with a tape measure
and then layout the flowers so that you have enough of them
to go around.  The jump rings don't add that much extra but
if you want you can lay them out too with a ruler to get an idea.
  Attach 2 jump rings between each of the flowers with your
pliers and then added another jump ring to attach the clasp
at both ends of the bracelet.  I wanted to add a little sparkle so I used
E600 with a toothpick and glued on tiny rhinestones inside each
of the flowers with my pointed tweezers.  I use my tweezers
alot and always come in handy for little things.

After I made it I found out that it would be better to glue on
another set of the flowers on the back of each like I did for the
earrings below.  Having the extra thickness will help make
the rings keep it together better.  Just a hint :)


To make the earrings I glued together 2 of the flowers for each
of them and let them dry like the bracelet.  I added a small jump
ring so that I could attach it to the earring pieces.

I hope you like it and try making something gorgeous
to wear too.  There is always something fun to make
with all the pretty things in the store.


Thursday, December 19, 2013

Christmas Snowflakes

It's busy around our house this week... we are shopping and 
wrapping and I am getting those last few projects done
and mailed into Spellbinders and I can't wait to show you
some of the things that they are going to have for 2014!!
It is going to be more than amazing and like me
you are going to love all of it....  :)

But since I can't show you--- I made a Christmas card
to share with some of my favorite dies... snowflakes!
We don't get snow down here in southern California
although i can see it up in the mountains and I love
skiing in it and walking in a new snow in the mountains.


So i love making things with these dies.  Spellbinders
has lots of them that you can mix and match, add rhinestones
 and they are just beautiful and you can see them here...

I used the 2013 Snowflake Pendant die set for the center
of the card and I layered it on the Exquisite Circles Die Set.
To make the dies pop out i layered them with foam
dots and changed patterns of red and green. If you click on
the card you can see it better too.  The papers I used are
from Bo Bunny's Christmas line from last year.


At the bottom of my card I also cut the edge with another
of my favorite dies called Curved Borders Two.  You get 
6 dies in this set with lots of intricate edges and they
are really fun to mix and match to make your cards that
much more special to give out to friends and family.

Yesterday we got to spend a fun afternoon at Disneyland
and I have some wonderful photos to share.  It was so
fun watching all the kids and the characters get to excited
and all the decorations they have are just so beautiful.
It was really, really fun.

Thanks for stopping over and i hope you do something
fun and festive today too....

Sunday, December 15, 2013

First Butterbee Scraps Post up

Hi Everyone, today is my first post up for Butterbee Scraps 
and I have a couple of fun quick and easy things to share with all of you.  

My first project is an ornament that i made with one of 
the larger bronze Filigree Embellishments #941. We are decorating
everywhere in our house and after decorating my daughters tree
I had the perfect inspiration to create my own ornaments for it.


The big bronze filigree shape was the perfect size piece to use 
as the base and I started by gluing two of the pieces together with E600. 
That way if the ornament turned both sides would be pretty.
 Then I glued on the bronze cabochon filigree #F805-B  on the front
of the ornament and let it all dry.  


My next step was to add some really light pink fine glitter 
with some wet adhesive into the circle in the center of the ornament 
and let that dry. Then I glued on the acrylic dome over it.


To make the dangle, I used a bronze flathead pin and added
a clear bead, then a teardrop pink bead, another clear bead and a then
a matching pink bead and created a loop to attach it to the base with
my needle nose pliers and my nylon jaw pliers.  For the top of the ornament
I added 2 jump rings and then bent a piece of 20 gauge bronze 
wire to form a matching metal loop to hang up my ornament.  Lastly
 i finished it by gluing on a pink bow to give it a really feminine feel.  Wouldn't 
this be so pretty on a tree filled with clear glass and pink ornaments?

My next project is a paper box that I created with snowflake paper I 
had in my stash and I used a few Spellbinders dies and finished it 
with a beautiful Butterbee Scraps Filigree embellishment and the 
same circle filigree embellishment I used for the center of my ornament.


To create my box I cut 2 pieces of 6x6 paper and scored them 1" 
all around the four sides and then cut four slits and folded the sides
 in and glued them together.  To make my box sturdier
I also put a small 1/2" paper strip around the top to reinforce it.

Then I cut 2 pieces of the Spellbinders Labels Twenty Two and
layered them on the top with adhesive and foam dots.  My next 
step was to cut/emboss the Venetian Motifs die in both yellow
and aqua and layer that on the top with more foam squares.  


To finish it I glued two pieces of Bronze filigree 068-B in opposite 
directions and then glued on the beautiful Cabachon # F805-B.  This
time instead of filling it with glitter I traced the clear dome and cut
out a matching piece of paper to put under it and then glue both of them
down.  I added a few clear rhinestones on the top to make it a little 
more fancier and that was all it needed.  The filigree pieces are so
pretty and ornate and they finish everything so beautifully.


I hope you liked the projects I made
with all the wonderful products you can get from Butterbee Scraps!

Have a wonderful day,  Teresa


Friday, December 6, 2013

Exciting News to share today..


Today I have some great news to share....

There is a wonderful online shop that sells the most amazing 
products to create jewelry and lots of other fun things with
called Butterbeescraps (zibbet) and I get the
privilege of designing for them for the next 6 months. 

I am a huge jewelry junkie so this is right up my alley...
 I am so happy and so honored and can't wait to share
 lots of fun projects to make with all of you.

Be sure and check out the website and get ready to order..
their prices are the best and there is so much to chose from!!


Have a great day,
Teresa

Saturday, November 30, 2013

Doodlebug Christmas

I think if there was ever a paper line that I loved to use it
would have to be Doodlebug.  The Christmas line just came in
at my local scrapbook store so I bought a bunch and made some
fun cards to send out and a few other goodies to give for the holiday.


I love the refrigerator magnet on the top left the best.  I used the
cute little snowman and one of the adhesive tags for the title
and I am going to put a cute photo of my kids in it.  

And the notepad for all my Christmas to do's was also a great
thing for me.  Now I have a really cute holiday pad to remind
of what I still have to do.... hopefully the list will be short :)

My third project is a gift card holder and I used one of the tags
to decorate and the cute little red bird and a poinsettia.  I tied 
some of the twine to make a bow and added one of the tags
at the bottom to finish it.  It's very cute... and I love the colors.

And lastly the clear box was perfect to wrap a belly band
around and fill it with good things for hot chocolate.  I saw these
chocolate dipped peppermint sticks I thought would work good
too so I will have to go search again this week. 

Be sure and head up to Scrap N Yap and get some of this
cute paper to create with... the fun is starting so you better
hurry before it's all gone.  Happy Holidays!


Wednesday, November 27, 2013

Happy Thanksgiving to you...

I love this time of year and I can see why our nation took
the time after the harvest was done to celebrate and be Thankful
for everything that we have.  I am so Thankful for my family
and friends and all the new friends I have made on the
Spellbinders Team and Quietfire Design Team.  It truly is amazing
the doors that have opened for me these past few years..


This page seemed appropriate to share of my beautiful niece
when she was away at college.  The papers are from Simple Stories
and it had the perfect colors and perfect tags that I needed.

Thanks for stopping and I hope your holiday is fun and relaxing
and filled with many wonderful blessings!  

Hugs and Smiles,  Teresa

Thursday, November 21, 2013

Spellbinders Platinum Preferred Partners


Hi Everyone and I hope you are having a great week!

Over on the Spellbinders Blog we are having a special
Blog Hop with some amazing projects being featured 
using lots of our Platinum Preferred Product Partners.
There is lots of prizes and lots of inspiration so be sure
and hop on over today to see what they are sharing!!


Today I am sharing a quick Christmas card I made
using some of my favorite Spellbinders Dies and lots
of products given to us by these wonderful companies to use:

Quietfire Design, May Arts, KaiserCraft, Imagine/Tsukineko
SCRAPBOOK ADHESIVES BY 3L, Scor-Pal and Want2Scrap....
They are so generous and today we want to give them a special
thank you for giving us such amazing things to use! (Feeling lucky)


The Spellbinders Dies I used are:
S5-026 Labels Twenty 
S5-148 Decorative Labels Eight


Thanks for stopping over and don't forget to check out the hop :)


Monday, November 11, 2013

Sisterly Love

I love getting old photos from family members and this photo
was such a treasure for me to see my mom and my uncle
together when they were growing up.  I did a page using 
both new and old Spellbinders dies and mixing them up to
create a wonderful keepsake for me and for my kids forever.


To make this page I used some brand new papers from Fancy Pants 
that really went well with the greys in the photo.  I love the texture that
the new dies give to the paper and you get so much versatility when you
combine them with all the other dies that Spellbinders carries.

You can get the complete list of dies and papers that i 
used if you check the Spellbinders gallery page here....


Wednesday, November 6, 2013

and many more....

I love birthdays and they are very special in my family.
It is very important that you are on this earth and
we think it's the best way to celebrate that!

So today i am sharing a quick card to give someone you love.  


I love the browns and pinks and green on this.  It's 
not something I would normally put together but I
really like the colors.  The papers are by Authentique.
The dies are of course by Spellbinders and the stamp
is from Hero Arts and I stamped it with dark brown ink
and embossed it with clear.  I finished it with some pretty
pink rhinestones from Want2Scrap and wha laa!
That is our new favorite saying in card club when
you do something you love and it comes out good :)

So have a great day and thanks for stopping...

Saturday, November 2, 2013

My 2014 Daily Book

Hi Everyone and I hope that you are having a wonderful
weekend.  I have a fun thing to share and I know that it's early
but the way my life is these days I think that it is probably best
I get this ready to use.  I love journaling all the time and it's fun
to keep a note of funny and wonderful things that happen in
our daily lives.  It's the stuff that movies are made of right?


I did this book using a journal from Fancy Pants and they
are amazing.  There is lot of pages for photos and journaling
and you can add lots of scrapbooking goodies to the inside
as well as the outside.  The papers and other fun goodies
I used for this project are from Prima.  One of the papers
at the top and bottom with the filmstrip is from Bo Bunny
and the Moma Razi line.  Love those papers, they are so cute.


 I wanted to use lots of flowers for the front
so I did a huge cluster and added some wooden
flowers with rhinestones and butterflies.


The letters I used are from LYB and Thickers.
The memories word is in the paper and I cut it
so that it would be on the front like this.  I also
used some of the rhinestone arrows they came out
with just cause I love glitter things... Must be
that I was born in Hollywood.... 

I hope you like it and will make up a beautiful one
for yourself before the year starts... Have a great
week and thanks for stopping over :)

Hugs and Smiles...

Wednesday, October 30, 2013

New papers from Echo Park

Today I have a new card to share with a new 6x6 pad
that I got from Echo Park called Reflections.  It has
really yummy colors and prints in it and I came up with
this shaped card which is one of my favorites and used
another of my favorite Spellbinders dies for the center
sun and the sentiment.

I really love blues and yellows together.  It reminds
me so much of the Dutch blues and whites and I love
Daffodils so this is just perfect.  It was really easy to
make cutting just strips for the sides and then doing a
layered medallion for the center with the Persian Motifs
die set and stamping it in royal blue ink to match. 
The ribbon is silk and you can get it at the Stamp Simply Ribbon 
store online.  They have amazing ribbons and
they ship to you right away.  They are a super great source
for ribbons, papers and lots of other goodies....
and the prices are really good!!

I hope you like and thanks again for stopping over..

Monday, October 28, 2013

Using Neutrals for my Cards

I love creative challenges and I have said before that
working in a scrapbook store for 12 years had me using
alot of patterned paper all the time but since I have
been using all the new beautiful dies that Spellbinders has
been creating I have started to switch to more simple papers.

Today I am just using 2 neutral paper colors: tan and cream.


I used Decorative Labels Eight for my card and just cut out
pieces of each and layered them with foam dots. The embossing
stands out so much better on it and all I needed was to add
a pretty ribbon, a flower and I added some wooden leaves
from Prima that I inked ever so slightly with brown chalk ink.  
The pearls are from Want2Scrap and they are the best and 
come in a jillion colors it seems like.  You can order online too
if you can't find them in your local store here....

I have been really busy this week creating lots of fun
things to share so be sure and check back for
more fun inspiration using my favorite SB dies!

Have a really wonderful day....

Saturday, October 26, 2013

Spellbinders Christmas Class at the Yap

Hi Everyone it's Saturday already and today I am teaching
a really fun class all with Spellbinders dies at my LSS
called Scrap N Yap.  You can imagine how happy I am just
using all the fun dies they have for the holidays to create
some fun projects to get us all in the spirit of the season. Yahoo!!


We are using most of the new release dies so that the ladies 
can see how they look used for something and i think it is going
to be a really fun event for all of us.  I will post some photos
of all of them tomorrow so share and maybe some better photos
of the projects too.  Here is the list of dies we used just in
case you feel like you need to get a few right :)  

S5-055 Poinsettia
S5-166 Ornate Squares
S4-310 Labels Eighteen
EL-013 Winter Wonders Embossing Folder
EL-034 Decorative Fancy Tags Two
S4-403 Mr and Mrs Snowman
S4-404 Create a Flake Four
S5-185 Snowflake Pendant
S5-186 Dimensional Snowflake
S4-401 2013 Heirloom Ornaments

And I almost forgot I have some other projects I am bringing
in just to share for inspiration with other dies we didn't have time
to use in the class... Be sure and check the On the Road Blog
for more info on stores we visit and teaches classes at.

Have a wonderful weekend... Teresa

Wednesday, October 23, 2013

Just for a birthday

Hello everyone and thanks for coming over
today.  I had such a good time last week going to my
favorite stamp store up in Elk Grove California I had
a pile of things to make this week it seems.  One of 
them I just finished was a simple card from a 6x6 pad
that had the designs on it already.  All I needed to do
was add a few flowers and I created the envelope at
the top by using part of a Spellbinders label die and cut
just a piece for the top.  I love the colors of this and think
I am going to make up a few more to send out.


The stamp is from Hero Arts and the set has lots
of great sentiments on it.  The flowers are from
Prima and the ink I used is from Tsukineko.

Thanks so much for stopping over... gotta run
and work on Card Club and my Spellbinders Class 
coming up this weekend and next. 
Hugs and Smiles... Teresa

Monday, October 21, 2013

A Special Birthday card..

Hi Everyone and thanks so much for coming to see
what's new on my blog this week.  If you are just stopping
over I have been sharing some fun cards that I did with
the New Die D-lites released from Spellbinders this week.


Today I have another one using another of the Medallions
and this one is called Medallion Seven .  This is a really pretty 
lacey die with beautiful embossing and I decided to use it as a 
border and I cut and embossed it 3X in white card stock
and ran 2 small pieces of pink silk ribbon through them and
tied them in the center.  I also used the Bitty Blossoms die
and made a pretty white flower and leaves to put in the middle.

For the outside border on the grey dotted paper I embossed the
Matting Basics dies into the paper but didn't cut it.  It's a really
pretty way to create a border and it's really, really easy to do.


That's all for today and hope you are as inspired to try some
of these fun little dies like me!  Have a wonderful day :)

Saturday, October 19, 2013

Another fun Die D-lite today...

I have another pretty card to share today with all of you 
that I did with one of the New Flower Die D-lites out this 
month for Spellbinders.  You can also see it in the gallery here.... 
and I have another view to show you today. 
 For the flower on my card I used the new Blooms Four die 
and made it in a bright pretty pink card stock from Bazzill.


The embossing on it is quite striking and using the Media Mixage
Keys plate and white paper made it really easy.  The back round
die is Label Thirty-Two.  Don't you just love the embossing
on the flower too?  It's beautiful I think and really adds the
perfect touch to the card.  And the papers are from Bo Bunny.


Thanks for stopping and don't forget to check out all the other
wonderful projects in the gallery for more SB inspiration.
We are headed out this morning to a fun local car show
and of course i have to pick up some kettlecorn popcorn.

Hugs and Smiles and Happy Saturday to you all

Thursday, October 17, 2013

Cardabilites #85

Today I decided to play along again with Cardabilites
new sketch and use a few of the New Die D-lites
to make a card.  I kept pretty true to the sketch to
make it fast and easy so it was really fun and I am happy
with the way it came out.  For this card I used the
New Medallions Four and also the Corner Sprigs die set
which I am using alot these days for all my flowery cards.


I also used the heart piece of the Spellbinders On the Edge
die set to make an edge border across the center
 on my card. The flowers are from Prima and the Thank you is a sticker.


Here is the new sketch up on Cardabilites
just in case you want to play along too.
Thanks for stopping by and hope your day
is wonderful and crafty :)

Wednesday, October 16, 2013

New Die D-lites coming out with Spellbinders

I have had lots of fun making some quick and easy cards
with the new Die D-lites that just were released by Spellbinders
this week and I am trying some new ways to shoot my pictures too.


This is a card I did with the New Medallion Two die.
I used mostly white cardstock for the back that I
embossed with a really pretty embossing folder
also from Spellbinders called Lovely Lattice.  For
the medallion I cut it once for the back in pink and
then cut just the edge in white and then again with
the edge and the medallion and popped it up with foam
dots so that the layers show up really pretty.
At the bottom I layered a pretty piece of lace
and tied a pretty satin ribbon over it.
Some of the pearls I used from Want2Scrap and the 
others I made with a pearl pen but they didn't seem to
photograph so well.  And finally the stamp I used is from 
one of my favorite sets from Lily of the Valley.


You can also see the other medallions in the set here..
There are so many to chose from and so many neat
projects that you can make with them too.

Thanks for stopping over to visit and I will be sharing
more of the dies so be sure and check back soon.

Wednesday, October 9, 2013

Adventure Mini Envelope Album

So a long time back I made a really neat mini book with envelopes
and a new die from Spellbinders called Celtic Accents.  Well the
Irish part of me took over and I made this really beautiful book
that Spellbinders used for a few ads.  And finally I get to share it
with all of you.  Oh and it even got to go over to Ireland when they
were doing a show there last year... how cool is that?


All the pieces of this die set made it easy to create
lots of beautiful pieces for the outside and the inside.


I made my book with a purchased leather outside and used
kraft envelopes and cards for the inside.  For the outside I cut
and embossed pieces of card stock in rich burgundy and green
and then inked them up with brown chalk inks.  Then I layered
them and added the word adventure with black adhesive letters.
I love to travel and this was another fun idea to create a place
to store the bits of things i find and photos along the way in
my journeys. Someday i hope to go to Ireland to see where my
Grandmother came from and I'll be ready but I think that I
 I will need a much bigger book with all the things I find.


I also bound the book and added my own wires
and those are from American Craft. Super easy to do.
That's it for today but be sure and visit the Spellbinders
page for more information on this project and lots more!

Happy Wednesday and hope you are crafting something
really fun today....

Monday, October 7, 2013

Beautiful People Card

It has been a busy, busy week with so many projects going
and classes but I made to the other side yesterday and happily
everything went really well and I even got some happy mail!!

Today I am sharing a simple card from some of my favorite
papers by Teresa Collins.  I have been lucky enough to meet
her in person and I am so inspired by her and so love what
she creates to share with all of us. 


and...I am so blessed to have so many people like this in my life
and had the opportunity to share a fun day of making 
cards with some of them Sat at the Prima warehouse and Friday
at Scrap N Yap.  They truly are amazing ladies :)

and last but not least today 
I followed the Cardabilites sketch this week a little and
wanted to share what Karan created for us to try...

Thanks for dropping over and hope your week
is filled with wonderful crafty things too....

Hugs and Smiles,  Teresa

LinkWithin

Related Posts Plugin for WordPress, Blogger...