Friday, January 31, 2014

Love Notes Blogger Post

Hi Everyone... yay it's friday and I just wanted to share a quick
post that I had the opportunity to do for Spellbinders for these
cute little Love Notes.  I made them with the idea in mind
to send to everyone you love anytime and not just for Valentines!


Be sure and hop on over to the blog post here
and leave a quick note to say hi and let them know if you like it..
It was a real fun and easy project to do.

Have a great day...with lots of smiles :)

Tuesday, January 28, 2014

Memory Box with Butterbee Scraps

Today I have a fun project to share that brought me  
back to my old painting days.  I loved decorative painting
and using all the pretty decorative pieces from the 
Butterbee Scraps store was a whole new way to play!!


To start with you will need Acrylic paints, paintbrush,
sandpaper, wooden box, base coat sealer, old T-shirt
and lots of goodies to decorate with.

 I used an unfinished box that I got at my local craft store 
for the base. Be sure that you sand it good and fill any cracks
first and then spray or paint a coat of sealer onto it before painting.

These are the products that i used from the Butterbee Scraps
store:  067-B small bronze flowers
294-B large bronze flowers
024-B Bronze leaves, 807 Bronze corners,
HD093-B Drawer Pulls, HD092-B Bronze box feet


For the base of the box I layered a couple colors of
acrylic paint onto it and kept it light and thin and with the grain.
After I let it dry,  I attached the stencil on with light
tack tape and then used a paint brush and dry brushed
on the design onto the top and sides. I think I would have gotten
a better result with a stipple brush but I didn't have one on hand.
(Note to self...invest in better paint brushes :) 


After the stencil paint was dry I layered another coat of 
Deco Art Metallic Lustre with an old t shirt.  If it
is too thick then use some water to thin it out.


After it was good and dry I added the embellishments
on the corners and the top.  I also glued on those beautiful
bronze legs and the drawer front .... and i brushed them
all with a little bit of lighter bronze paint to give
them just a little bit more colors and depth.


For the top I took the flowers and leaves and bent them
ever so slightly and made a flower.  The center is just a 
large bead that really went well with all the colors that I used.

I hope that you will give one of these a go sometime....
There are lots of great wood pieces out there to decorate
and it's really fun and would make a great gift too. 

Thanks for dropping by and have a wonderful week :)


Wednesday, January 22, 2014

Butterbees Necklace


I have another project to share with you all with some of the
beautiful products that Monique sent me from the Butterbee Scraps store.
Today I am sharing a necklace with one of my favorite Locket pieces
and lots of silver and turquoise beads.


So my favorite color is turquoise so it's no surprise I picked
this big beautiful silver heart locket set and some turquoise beads to 
create my necklace with.  I really love all the details in this
locket set and they had the perfect extras to make it easy to do.


So to start with you will need these things from
the Butterbee Scraps website:


 and you will need Silver 18 and 20 gauge wire, 4mm silver beads
6/0 E Beads in turquoise, bead stringing wire,
Beadalon wire cutters, nylon jaw pliers and chain nose pliers.


Start by cutting pieces of wire about 3 inches long and looping
the end and stringing on the beads as shown and looping the other end.
You will need 4 of these for each side.

For the front make about a 1/2" triple jump ring to hang the
locket, flower and key on in the center.  Attach jump rings to each
of the charms and use your pliers to add them to the ring.  
Add extra little rhinestones from the store too if desired like i did.


For the next part take your needle nose pliers and twist
the 20 gauge silver wire to create 2 triple loops side by side.
These are going between the beads that you created.
Attach them together with your pliers.  Next you are going
to string a piece of bead stringing wire through one of the ends
and start adding about 3" of beads.  Tie and knot the closure
on one end and slip the leftover string back through the
beads and trim.  Do the same for the other side of the necklace.


I hope you liked my new necklace and be sure and stop over
for the sale going on in the Butterbee Scraps website today.

Have a wonderful day,
Teresa

Monday, January 20, 2014

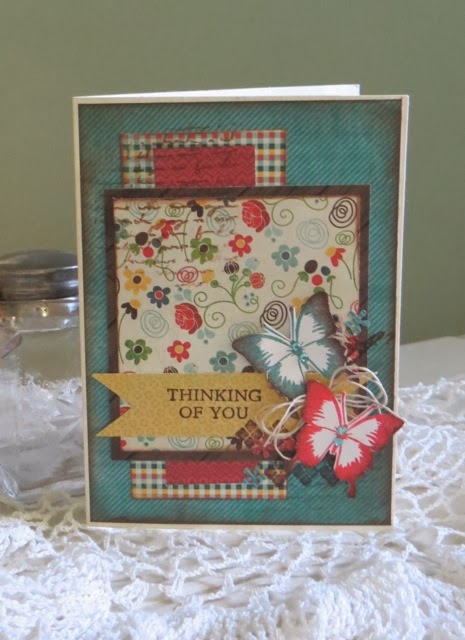
Cardabilites #91

Happy Monday everyone... today is a quick post
to join in the new Cardabilities challenge this week.
It was quick and I had fun using some of the stamps
and things that I had in my stash so that was good!


I layered everything pretty much the same but
changed the file tab to 2 pieces of layered paper
and then stamped my butterflies with a mix of 
Momento and Versa Magic inks to get the dark
edges on them.  I also embossed them with clear
so they had a little bit of a shine.  The stamps
are from 7 gypsies and Studio G.  Oh and to get 
the tiny word print on both ends I stamped with 
a really old Sizzix stamp set but you could use
anything that you have in your stash too.  
I hope you have a chance to make up a card too
and download it :)  You never know, you could
get picked for the card challenge winner !!  

Have a great day,
Teresa

Wednesday, January 15, 2014

Valentine cards with flowers


Hi Everyone I have a quick and easy project to do
for Valentines today using these cute little flowers from
Butterbee Scraps called Bronze Filigree Elements #CAP041B.
  They have lots of uses but I decided they looked more like
flowers yesterday and would be great to use as the center point
for my project to fill inside of a heart for my card.


Since they were Bronze to start with I painted them with
a new paint from Deco Art that is a multi surface satin paint
and i did about 3 coats and let them dry between each.


It dries really quick so the project goes fast.


 I added rhinestones from the shop with adhesive and then glued
them on a doily that I cut from a Spellbinders die.  They
fit really well actually.  I wanted it simple so I just used a
matted backround with pink and tied a pretty white bow for the bottom.

I really like it and hope you will try it too.. It's amazing the colors
of paint that they have so you can paint your Butterbee Scraps
projects in all the colors of the rainbow!  Sounds great to me :)

(Here is the caps below so that you can see them before their painted)


Happy Wednesday and happy crafting to you all!

Monday, January 13, 2014

Wonderful News


Lots of Wonderful News to share even though it will be a quick one 
today as I am off to spend the afternoon at Disneyland for my B-day.

First and best news is that I made the Cardabilites Design Team
again for the next couple of months.  There are lots of us returning
and lots of new talented girls from all around the globe so I am
sure there will be lots of inspiration this year with Karans' brilliant 
sketches that she does for Cardabilities and Sketchabilites.

You can see the announcement here for it!!  So excited to be back!!

Next the CHA show was amazing!!  I got to visit with so many friends
and see sooooo much new product that it was incredible.  I got to see
Teresa Collins, Fran from Stampendous (love her), Tim Holtz,
Sherrie Carroll from Hero Arts and I even got to meet Kellie Fortin
from JustRite Stamps.  And of course my 2 favorites Suzanne and Judy!!


Judy is on the Spellbinders Design Team and Suzanne is the owner
of Quietfire Stamps up in Canada.  It was a really fun day and I will
post more photos from the show of my favorite things tomorrow.
There are going to be lots of fun classes in the future up at Scrap N Yap!!

Headed off the the happiest place on earth now... Hugs to you all :)

Friday, January 10, 2014

Card Club for January


I am having 2 classes today and tomorrow filled with fun
love themed cards to make... I am really excited 
and love the stamps and paper that I picked for it.
The stamps are from Verve and Whipper Snapper
and the paper is a Valentine 6x6 pad from Authentique.


I am completely sold out for both days but call the store
and sign up early for next month... it's going to be lots
and lots of fun Birthday cards to get you ready for the year.

Better be off... it's time to get ready for class!!

Happy Friday to you all...
Teresa

Scrap N Yap in Monrovia 626-357-2727
February 7th or the 8th from 10-1

Wednesday, January 8, 2014

New Butterbee Scraps Project up today

Hi Everyone it's time again to share another project
that I did with the wonderful goodies you can get from
the Butterbee Scraps online store.  


Today I decided use the products a little differently to make a card
using some of the hardware to decorate the front of it. I used the 
Square Bronze Filigree and Bronze Bead Caps in the centers of
each of the 4 squares to give it a fancier look. The papers are
from Prima's Nature Garden 6x6 paper pad in pretty shades
of purples and pinks. Keep reading to find out how I made it :)


For this project you will need the Prima paper pad, 4 bronze filigree 
and the Carnation Creations die, purple ink to match, adhesive,
foam dots, adhesive rhinestones, and a paper trimmer and scissors.


First you will need to cut a white card to 5x5.  Then cut the dark
purple paper to 4 7/8 x 4 7/8".  Next cut the flowered purple paper to
4 1/2 x 4 1/2 and glue them to the base.  Then cut the large 
Lacey squares die and glue that on with foam dots.  Cut/emboss
four of the smaller Lacey squares and ink around the edges. 
Glue them on the larger square and then glue one of the bronze filigree
squares onto the paper pieces.  Cut out flowers in pink and glue them
onto the filigree squares and then smash a bead cap flat and glue that
onto the flower.  To finish it you can add a pretty rhinestone or 
bead to match the papers.  And inside you can stamp any sentiment
that you would like so that you can give it to someone special!!


Here is a closeup of the metals on the top.  They are really beautiful
and can make any simple project be over the top gorgeous super easy.

Thanks so much for stopping by and don't forget to check out
the deals in the Butterbee Scraps Online store here....

Happy Wednesday to you all :)

Tuesday, January 7, 2014

Cardabilities post up #90

The new sketch is up on Cardabilites and I put together 
a really quick card today so that I can join in with everyone
and I got to use some of my new MME Valentines paper set.


The colors in this are so pretty and there is lots of glitter and 
beautiful patterns so it really went together in a snap.  The 
wooden frame and flowers i had in my stash and i inked them up
just a bit with Tsukineko chalk ink to match.  The heart embossing
 folder is from Spellbinders and i used it for the card and to 
emboss the envelope. It is called Twisted Hearts and you can get it online 
from Spellbinders if you can't find it in a store.


Here is Karan's sketch if you want to play along
too.  Just go to Cardabilites and load it at the bottom.


Have a really wonderful day,  Teresa

Monday, January 6, 2014

Happy New Year


Happy New year to all of you and I hope that your holidays
were spent having lots of fun with your families and friends
and I hope that you got a little crafting done too :)

Alot of people are picking a word to gear their ambitious life
to this year in 2014 and I thought about it for along time
and decided my word this year is:

"SIMPLIFY"

I have been working hard at my house to purge and clean
and simplify my life so that i have more time to do the
fun things I want time to do.  Kind of like a vacation but not.

I really want to make more quality crafting projects to 
share and get alot more published and of course spend time
keeping in touch with friends and traveling too.  So there it is.  
Oh and eat healthier and exercise more so that I can feel better
 doing all these things in my day to day life this year.
I am happier already just talking about it!!

Today I am going to share a card I did for my sister's 
birthday with a printable from LOTV.  I have lots of
stamps to use so I thought i would do a quick card with
one of my favorite dies this last release called 


my papers and added more colored pencil
to the image to darken it a bit and add some greens.
The word sentiment is from them too and you
get a whole sheet of wonderful sayings.


The matching pearls are from Want2Scrap and 
they are having a huge sale right now so you might
want to get in a quick order for them.  Best adhesive
bling on the market for me! I Love all of their products.

So that is it for today.. but check back I will have
a fun card I did for Butterbee Scraps and I will have
some giveaways too this week... Thank you to all
of you that leave comments for me... I love meeting
all of you from around the world and seeing what you
create too.  It's amazing and really special!

Hugs and Smiles to all of you!
Teresa

LinkWithin

Related Posts Plugin for WordPress, Blogger...